To make this security camera project you’ll need:
- Raspberry Pi Zero W
- Raspberry Pi camera module
- SG90 micro servo
- Micro SD card with latest Raspbian Jessie
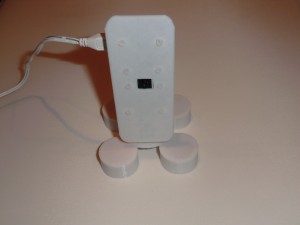
- 3D printed bracket and base
- 8x Nylon M2 nuts and bolts
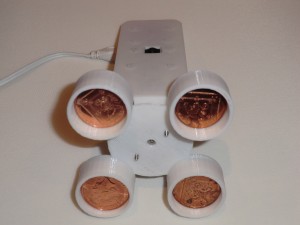
- 20x 2p coins to weight the base down
The STL files to print the brackets are at www.securipi.co.uk/twistcam.zip
and you can edit the original files at:
Before attaching the Raspberry Pi and camera to the 3D printed parts, it’s a good idea to do the following at the Desktop -> Preferences ->Raspberry Pi Configuration:
- Enable SSH
- Change passwords for Pi and Root users to something secure and hard to guess.
- Enable the camera
- Boot to CLI
Reboot the Pi and login to the terminal
sudo iwlist wlan0 scan
will show WiFi routers near your Pi
sudo nano /etc/wpa_supplicant/wpa_supplicant.conf
and add these lines at the bottom, using your routers SSID name and password
network={
ssid="testing"
psk="testingPassword"
}
Save the file, exit and reboot your Pi. It should now auto-attach to your wireless network when it boots up.
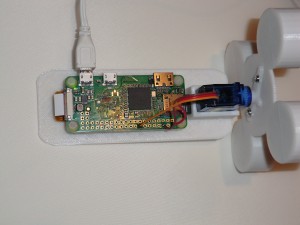
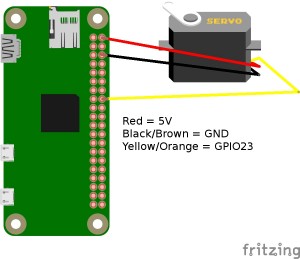
The servo wires can be soldered directly in place, or use a Pimoroni GPIO hammer header and cables instead.
Assemble all the parts together
We’re using the open-source ServoBlaster code to control the servo from the BASH command line.
We install it like this:
mkdir twistcam

cd twistcam

wget https://raw.githubusercontent.com/richardghirst/PiBits/master/ServoBlaster/user/servod.c

wget https://raw.githubusercontent.com/richardghirst/PiBits/master/ServoBlaster/user/Makefile

wget https://raw.githubusercontent.com/richardghirst/PiBits/master/ServoBlaster/user/init-script

wget https://raw.githubusercontent.com/richardghirst/PiBits/master/ServoBlaster/user/mailbox.c

wget https://raw.githubusercontent.com/richardghirst/PiBits/master/ServoBlaster/user/mailbox.h

make servod

sudo ./servod
Then test it’s working with:
echo 5=50% > /dev/servoblaster

echo 5=10% > /dev/servoblaster

echo 5=90% > /dev/servoblaster
The commands above move servo number 5 (Pan left & right) on GPIO23 between centre (50%),
left (10%) & right (90%) positions
Setup Video Streaming to a web browser.
On your Raspberry Pi, while in the twistcam folder we made earlier:
sudo apt-get install libav-tools git python3-picamera python3-ws4py
Download the zip file with:
wget http://www.securipi.co.uk/tcs.zip

unzip tcs.zip

chmod a+x *.sh

python3 server.py
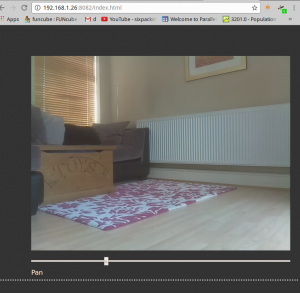
Then go to another PC on your network and open a web browser to:
http://ip-address-of-your-pi:8082/
And you should be able to pan the camera left and right using the slider, with hardly any lag.
Disable the red LED on the camera.
When you’re streaming video, you might not want anyone to know when the camera is active. It’s possible to turn off the camera’s red activity LED by doing this:
sudo nano /boot/config.txt
And at the end of the file add the line
disable_camera_led=1
Save and reboot your Pi.
Mounting the twistcam upside down.
The Twistcam is designed to sit on a flat surface the right way up, but if you mount it upside down , hanging from a ceiling or shelf then the video will be upside down and the pan controls the wrong way around. You can fix it by downloading this patch and overwriting the original server.py file.
wget http://www.securipi.co.uk/server.py
Start video streaming automatically at boot.
Edit /etc/rc.local so that servod and python3 server.py launch at startup.
nano /etc/rc.local
Insert these lines before the last line which says exit 0
cd /home/pi/twistcam
sudo ./servod
python3 server.py
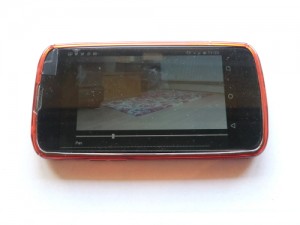
Save the file and reboot your Pi. Video feed can be controlled from PC or phone.
If you don’t have access to a 3D printer, you can buy the two 3D printed brackets and 8x nylon M2 nuts and bolts here for £11.99 inc VAT.
(Raspberry Pi, Camera and SG90 servo NOT included)
We ship worldwide. Next day delivery in UK and 14 days for delivery worldwide.
Sorry, the comment form is closed at this time.